

And here it is – my new mini-PC. A9 Max from Geekom. A smart little powerhouse, barely larger than a sandwich can, silent and surprisingly powerful. I unpacked it, plugged it in, and completed the initial setup. Everything works perfectly as my test shows.
And yet, after just a few minutes, I understand: this won’t last long. As soon as the program is installed, my fingers begin to itch with screwdrivers. Why? Because a ready-made PC is always a compromise, a very good one, but not my personal ideal.
Christoph Hoffmann
As a technology journalist and IT expert, I look at pre-built PCs from a different perspective. Manufacturers have to appeal to a wide audience and, above all, set an attractive price for it. This inevitably means that costs are being cut in certain areas. Not in the processor, since that is a showpiece, but in the components whose true performance only comes through in demanding day-to-day use.
Therefore, for me, buying such a mini-PC is not the end, but the beginning of an optimization project. I'm purchasing a great base to build my custom system on.
More RAM improves performance
The first and easiest upgrade is almost always RAM. The Geekom A9 Max comes with 32GB of RAM, which is more than enough for most users and everyday tasks such as web browsing, office work and streaming. But my daily use is different.
I often run a virtual machine for software testing, dozens of browser tabs with resource-intensive web applications, image editing programs and communication tools at the same time. This is where 32GB quickly becomes a bottleneck. The system starts to work slowly, switching between programs takes longer, and performance decreases.
The solution is simple and inexpensive: upgrade to 64 GB, for example using Kingston FURY Impact SO-DIMM 64 GB DDR5-5600 CL40 kit. Replacing RAM modules usually takes only a few minutes, and the results are noticeable immediately. Everything runs smoother, the system has more headroom and is better prepared for the software of tomorrow. In my opinion, this small investment offers the most bang for your buck.
SSD Upgrades: More Speed and Memory
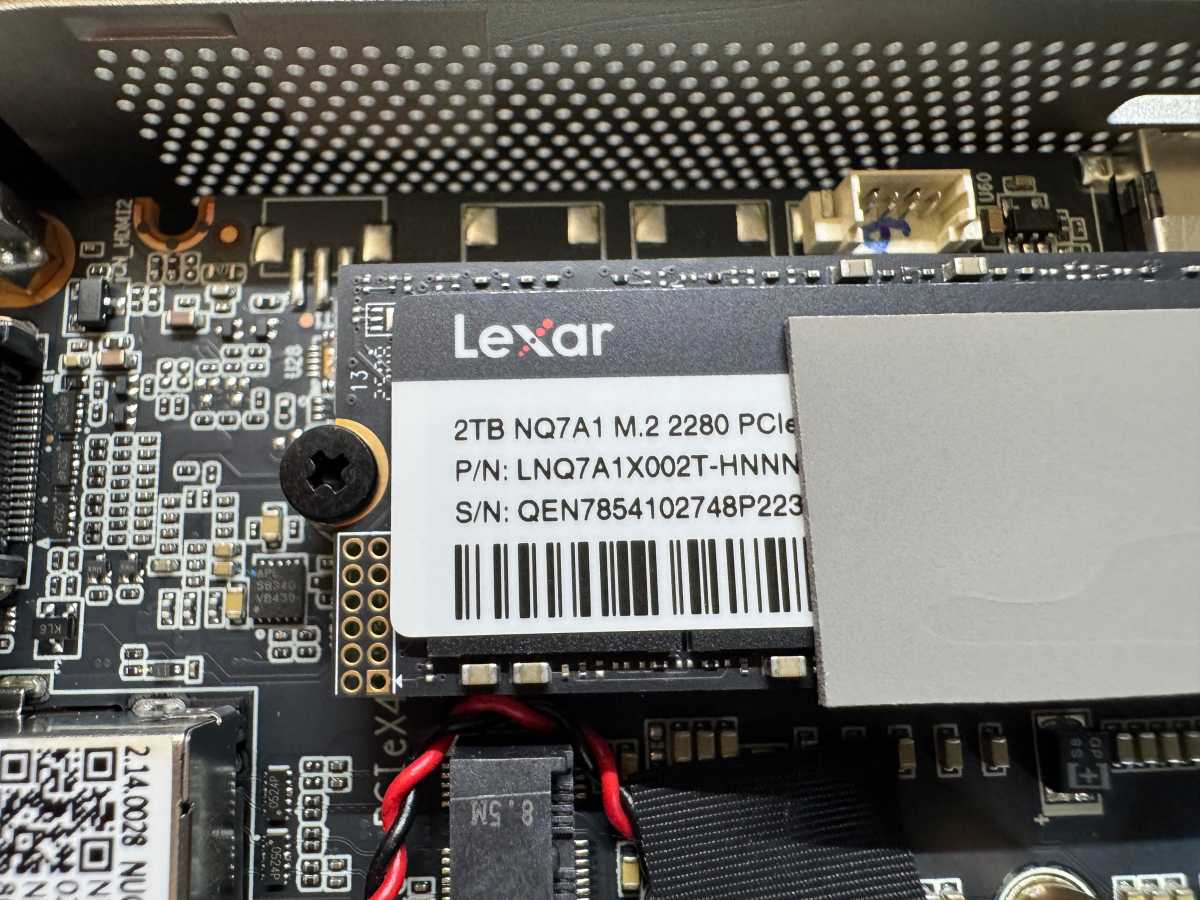
The second candidate for immediate improvement is storage devices, i.e. SSD. Here manufacturers save on two fronts: power and speed. 512 GB or 1 TB models are often installed. The 2TB NVMe SSD in our A9 Max comes from Lexar and is labeled LNQ7A1X002T.
Christoph Hoffmann
This sounds like a lot at first glance, but I traditionally separate my Windows installation on the C: drive from my data, which I sync with Dropbox. That's why I install a second SSD in the mini PC: an external hard drive can be used, but internal storage is second to none for quick access.
However, speed is even more important to me. Not all NVMe SSDs are created equal. Manufacturers often install cheap models that are faster than older SATA hard drives, but don't come close to matching the potential of modern interfaces.
The Lexar NVMe SSD installed in Geekom delivers 6,242 MB/s read speeds and 5,423 MB/s write speeds in CrystalDiskMark. This is above average for a PCIe 4.0 SSD, so there's no point in replacing it for performance reasons.
The system has a short M.2 slot (M.2-2230) for an additional SSD. The selection of compatible drives is somewhat limited. For our update we chose Crucial P310 2TB SSD. An alternative is Corsair MP600 Miniwhich comes in 1TB and 2TB capacities.
If the standard SSD installed in your mini PC performs below average, it makes sense to replace it with a high-end SSD. It turns your mini PC into a real powerhouse. Programs launch without delay, large files are copied in seconds, and the entire system becomes more direct and responsive. This is a level of comfort that I would not want to miss in my daily work.
Updating is easy
Before you start ordering or visit your local dealer, you should check the exact specifications of the mini PC. Geekom A9 Max has a short M.2 interface (M.2-2230) for an additional SSD, suitable for Crucial P310 2TB M.2 SSD.
The RAM configuration is interesting. The A9 Max (and many other models) has 32GB of RAM with two 16GB modules. To upgrade to 64 GB, you need to replace both sticks.
There's a good selection of compatible 64GB (2 x 32GB) dual-channel DDR5 memory kits running at 5600MHz. Popular options include Crucial value CT2K32G56C46S5 And Crucial Pro CP2K32G56C46U5. Alternatively, you can opt for a single (albeit more expensive) memory card to leave the option of upgrading to 128GB.
Before proceeding with the update or installation, make sure that the Mini PC is completely turned off and disconnected from the power source. To discharge any residual power from the system, press and hold the power button for about five seconds.
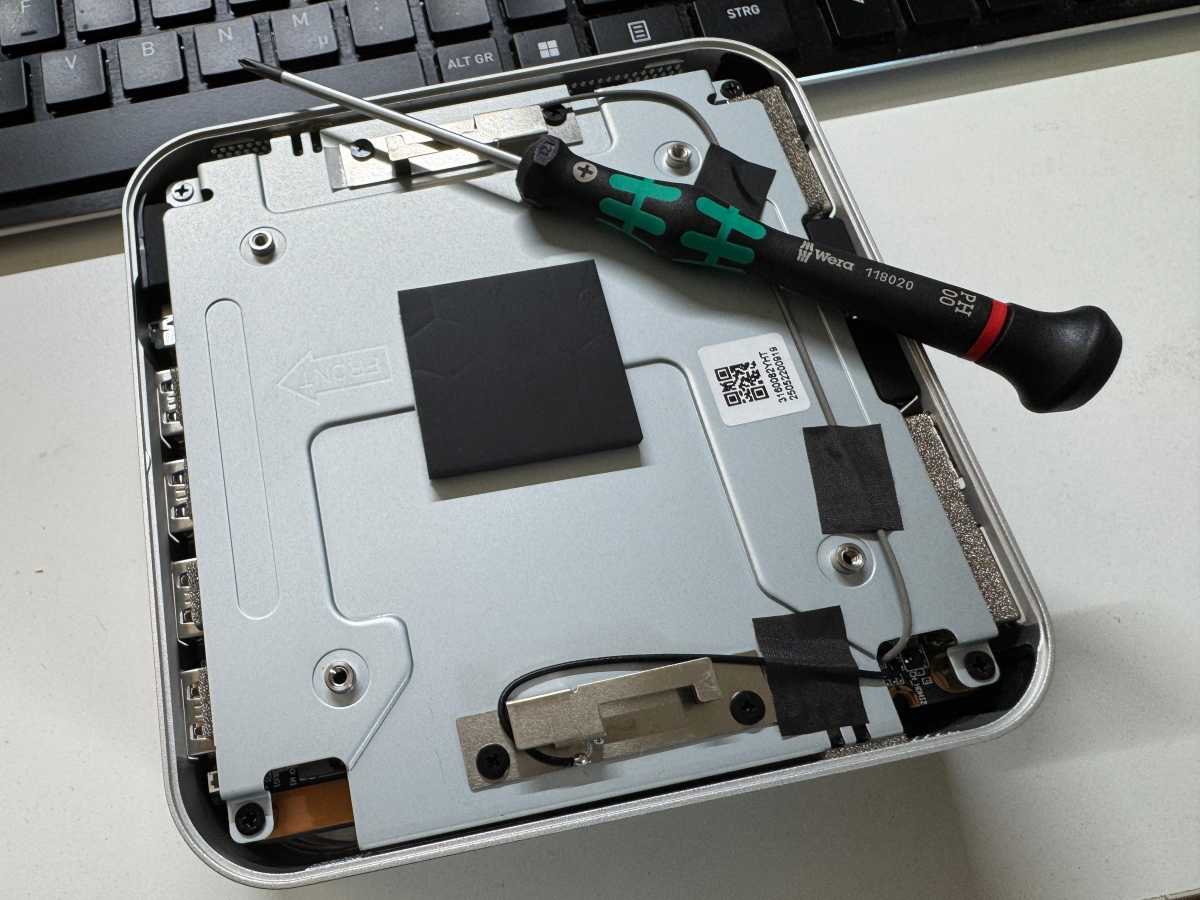
Opening the case can be a challenge (see Troubleshooting: No More Wi-Fi or Bluetooth). The screws on the underside are hidden behind rubber feet that can be pulled out with a sharp object. Once the screws are loosened, handle everything carefully.
Christoph Hoffmann
Once the inside of the mini PC is opened, you can access slots for two SSDs (1× M.2 2280 and 1× M.2 2230) and two memory slots. Some mini PCs also include a mounting bracket for a 2.5″ SATA SSD, such as Samsung 870 EVO.
On the Geekom A9 Max (and most other models), insert the M.2 SSD at a slight angle into the slot provided. Then gently push it down and secure the end with the small screw included. That's it!
The RAM modules are held in place by small metal or plastic clips on each side. Gently push these clips outward to release the RAM module, which will lift slightly so you can remove it.
Take the new RAM module and notice the notch. It must fit the corresponding guide in the slot to prevent incorrect installation.
Insert the module into the slot and press it firmly and evenly until you hear the side latches click. Made!
After installation, close the case and reconnect all cables. Start the mini PC and enter the BIOS (usually by pressing F2 or Del) to confirm that the new RAM is recognized.
Once installed, the new SSD will not automatically show up as a drive in Windows. It must first be initialized in Disk Management.
That's it! The mini PC now has more storage space and, thanks to upgraded RAM, additional performance headroom.
Troubleshooting Wi-Fi and Bluetooth problems
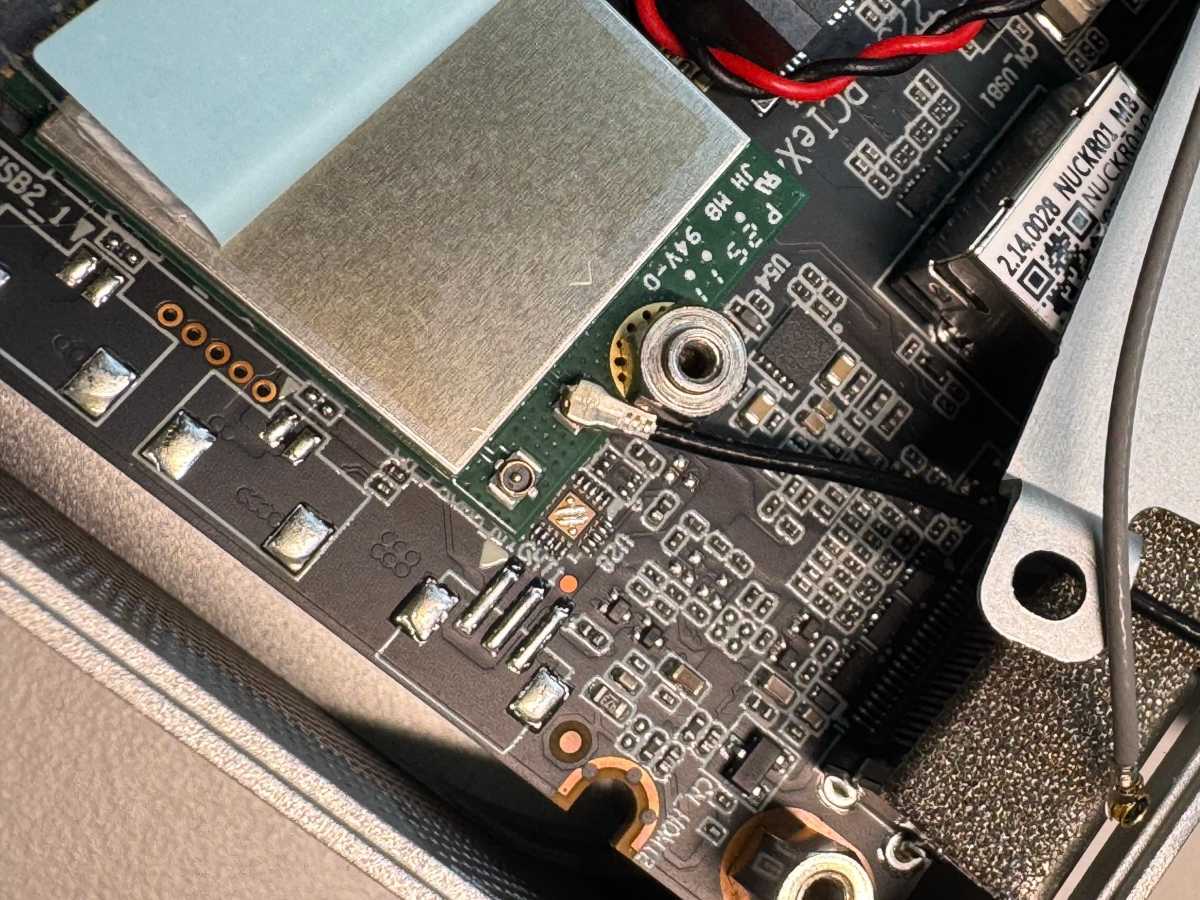
Please note that if you open the case and remove the inner metal cover, the black and gray cables may become disconnected. They are soldered to a metal cover and connected to a Wi-Fi card. If the connection is lost, Wi-Fi or Bluetooth features will no longer be available.
The cables are attached to the metal cover using adhesive strips, which limits their length. To ensure that the cables remain securely attached when the cover is raised, it is best to remove the strips and reposition the cables so that they remain connected.
Christoph Hoffmann
If the cables have already been disconnected, their ends must be reconnected to the Wi-Fi card. It's located underneath the M.2-2280 connector, so you'll need to carefully remove the SSD first.
With the Wi-Fi card exposed, use tweezers to carefully lift the self-adhesive clear plastic cover or flip it back. Then carefully connect the black cable to the jack labeled “Main” and the gray cable to the “AUX” jack.
This process requires patience and may take several attempts. Make sure the cover is securely closed before reinserting the SSD.


:quality(85):upscale()/2025/12/11/910/n/1922153/cc4ca460693b2eba8f7484.23273935_.png?w=150&resize=150,150&ssl=1 "The 9 MAC Gifts a Beauty Editor’s Adding to Her Own Wish List")


