For years I have been looking for an application that would allow me to control all the fans in my PC case from one place and relate the speed of the case fans to the GPU temperature. About five years ago I found it. Since then, Fan Control has become an integral part of my computer. I recommend it to anyone who needs a fan management app.
Fan management on Windows PC leaves much to be desired
After I built a new computer At the end of 2020, I realized that I couldn't let my GPU temperature dictate the speed of my case fans. I tried several fan control apps that I knew of, but none of them allowed me to create a custom case fan curve that was triggered by GPU temperature. I could only relate the speed of my case fans to the temperature of the CPU or motherboard.
Since I could also do this in BIOSI deleted the applications, went to BIOSand created a custom case fan curve based on CPU temperature. It worked fine, but it wasn't what I needed. I wanted to link my case fans to the GPU thermostats so that they only increase when the graphics card is under load, which more or less only happens during gaming.
On the other hand, tying the case fan speed to the processor temperature is far from ideal, since various tasks can temporarily load the processor and, in turn, increase the speed of the case fans. For example, I opened the browser, the temperature of my processor rose sharply, and the case fans exploded. I would then open a bunch of tabs and the fans would start making noise again. This process repeated itself over and over again throughout the day as I opened and used programs, opened new browser tabs, and performed any CPU-intensive activities.
This got on my nerves because I wanted the case fans to be silent most of the time and only get louder when gaming. So I went online to try and find an app that supported this feature. After a surprisingly short search I found a relatively new open source application, Fan control. This was everything I was looking for.
The fan control is easy to use yet packed with features
At the end of 2020, Fan Control was fresh out of the oven. The original version was released in June of that year. Despite its lack of features at the time, the app allowed me to create a custom case fan curve based on triggers that tied their speed to GPU temperature. It was almost everything I was looking for.
Over the years, Fan Control has acquired a lot of valuable features. This is currently the best solution to control fans on Windows PC. It supports many different fan curves, allows you to control each fan inside your case in very granular detail, has simple setup, is easy to use, and is loaded with features.
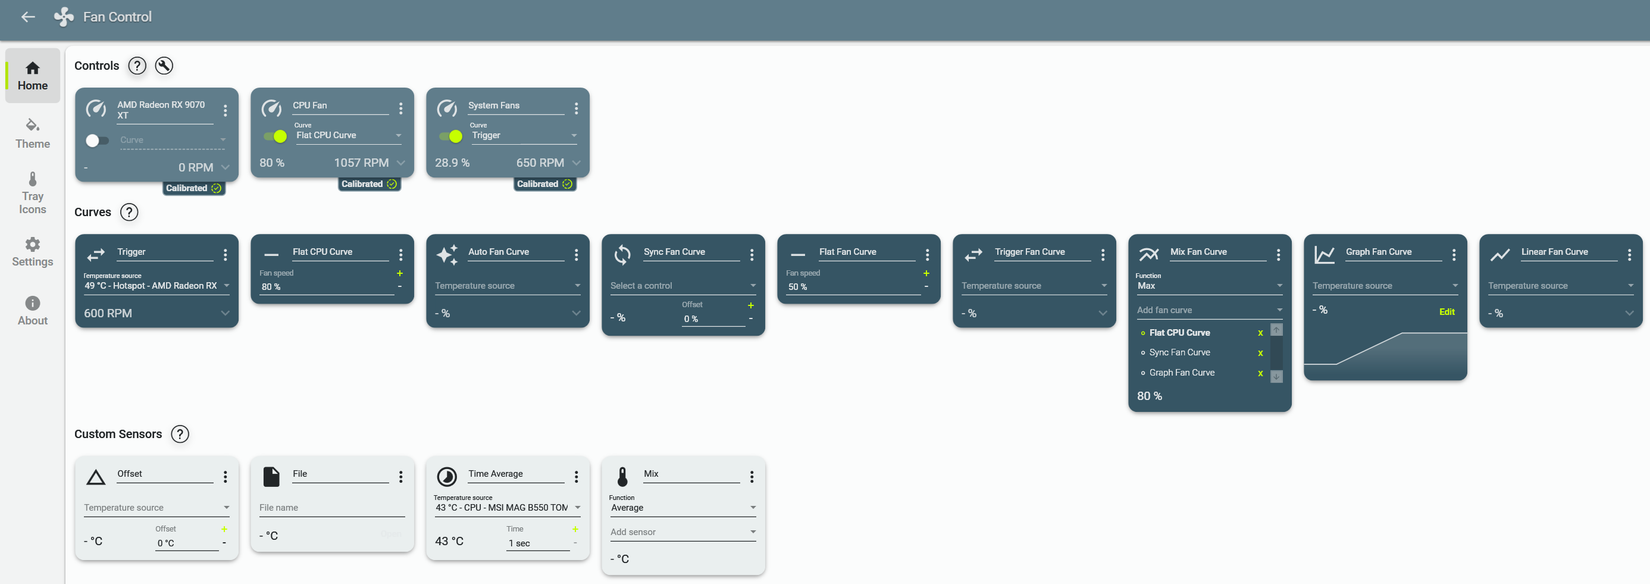
You can create seven different types of fan curves, manually control fans using sliders, and use a variety of different temperature sensors as sources for custom fan curves.
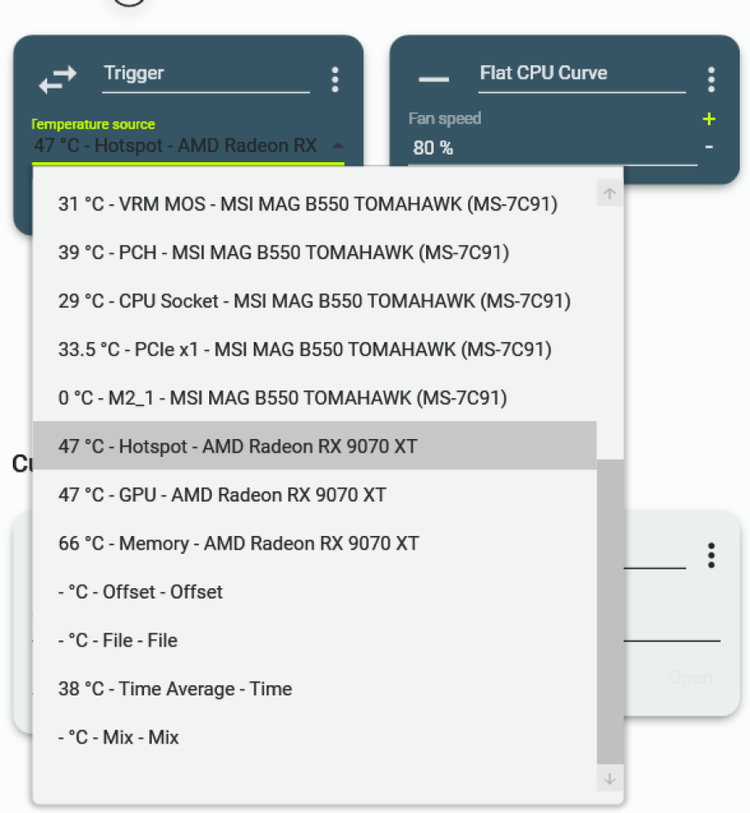
Fan Control supports multiple CPU and GPU sensors, as well as VRM, RAM, SSD temperature sensors, and even PSU thermal sensors if you have a Corsair power supply.
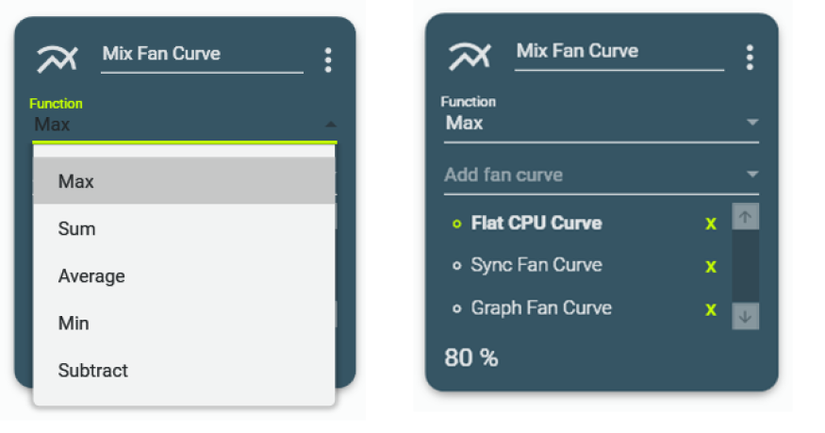
The app allows you to combine different thermal sensors into a single fan curve source, or include multiple existing fan curves as multiple sources for a new custom fan curve.
For example, you can create a custom case fan curve that uses both the CPU and GPU fan curves as sources. You can then set the active source to the one that is under the higher load, which will allow your case fans to match the speed of the GPU or CPU, whichever is under higher load at any given time.
You can also create your own sensor files and load them into the app, install third-party plugins, export fan configurations and use them on another PC with the same fan layout, and much more.
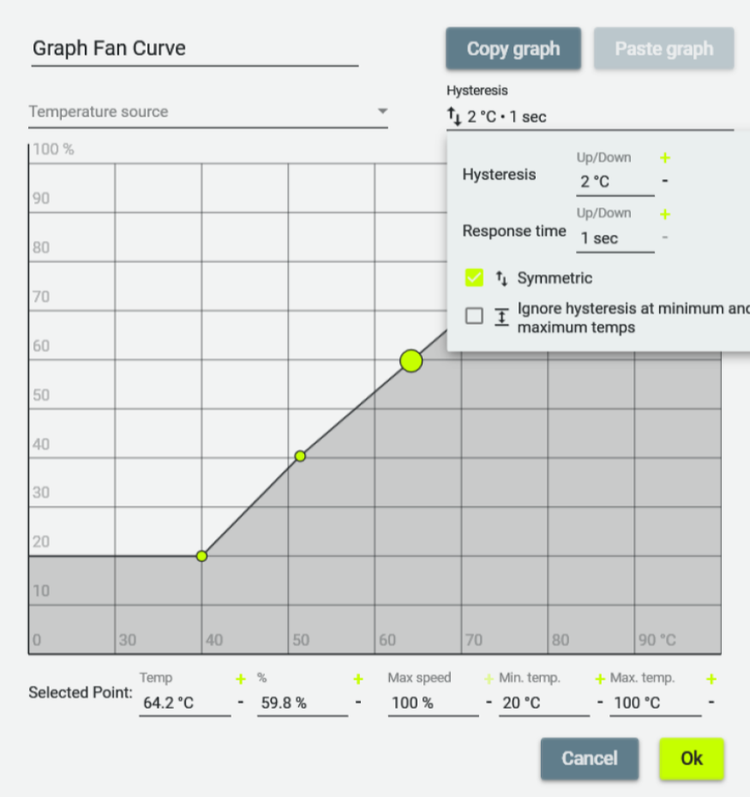
When it comes to editing custom fan curves, there are many variables you can configure: sensors that trigger fan activation, response time (the amount of time after which the fan speed increases or decreases), hysteresis (the difference in temperature after which the fan speed increases or decreases), fan speed in rpm and percentage, number of steps in graphical fan curves and much more.
The app supports CPU, GPU, and case fans, AIOs, and even the tiny fans found in an active M.2 SSD. radiators. As long as you connect the fan to one of the fan headers on the motherboard, you can control it. In short, Fan Control should recognize and control every fan found inside your case.
Fan Control also includes custom themes and is open source. Free EquipmentMonitor The software as a backend allows you to rename each temperature sensor and is completely free to use. In short, it's bursting at the seams with possibilities, and I wouldn't want it any other way.
The procedure for setting up the fan control is very simple
Accessing so many features can seem daunting, especially if you want to match your case's fan speed to your GPU temperature, as I did. Luckily, the procedure for setting up Fan Control is quite simple.
First download the latest version of the application from the website application download page. If you are using Windows 11, it is recommended to download the “.NET 8.0” installer as it is based on the latest version. .NET Framework version. You can download the “.NET 4.8” installer instead if you are using an older version of Windows that is not compatible with the latest version of the .NET Framework.
Windows may warn you against installing the application; just click “More details” and then click the “Run anyway” button. After installing the application, open it. Now you can read the license agreement or just click OK.
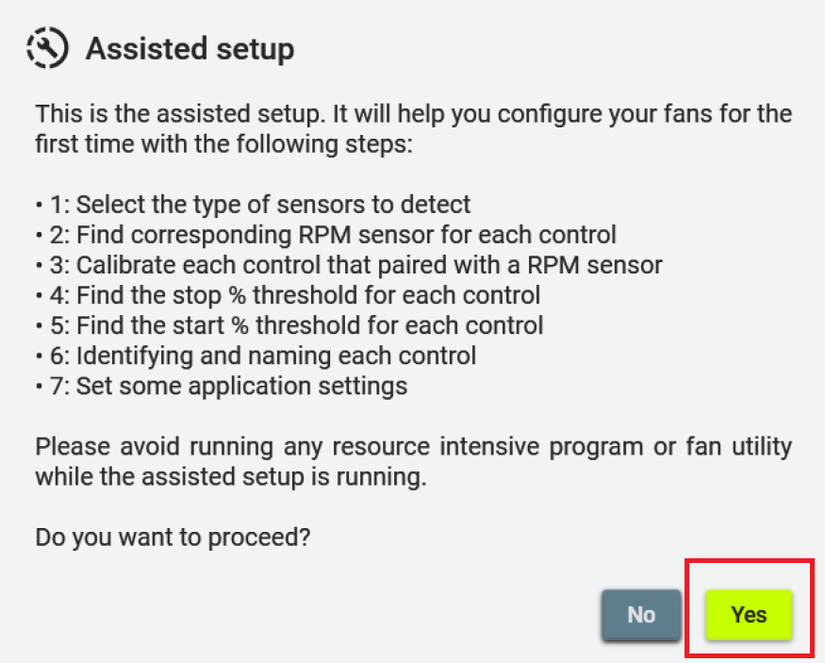
The app will then ask you if you want to run the assisted setup. I recommend doing this.
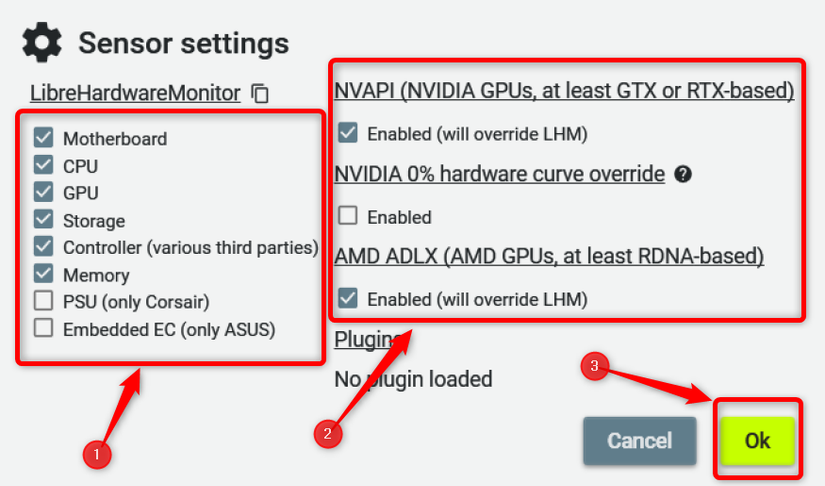
You can now choose which sensors you want to use. If you have an NVIDIA GPU and want to create a custom fan curve for it, be sure to check the “NVAPI” and “NVIDIA 0% hardware curve override” checkboxes. If you have an AMD RDNA GPU, check the “AMD ADLX” box. Then click “OK” to continue.
Now let the app discover and pair the fan control sensors with the corresponding speed sensors. Your fans will accelerate to maximumbut that's ok. This may take a while as Fan Control checks every fan header on your motherboard as well as your GPU fans.
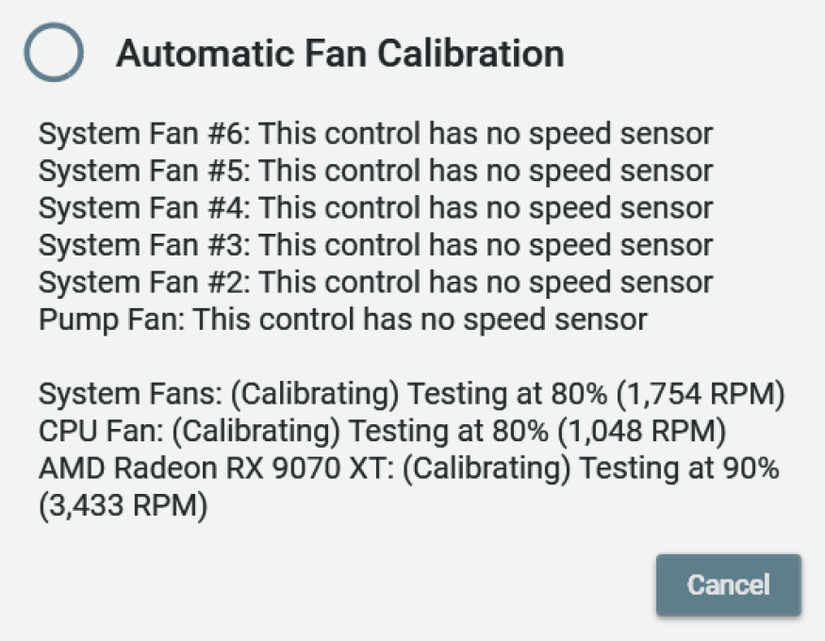
Then it's time for automatic fan calibration, which will ramp each fan up to 100% again. This step will complete in a few minutes, right after Fan Control has finished calibrating the detected fans. If your case fans are connected in series, Fan Control will display them as a single fan because they only use one fan header.
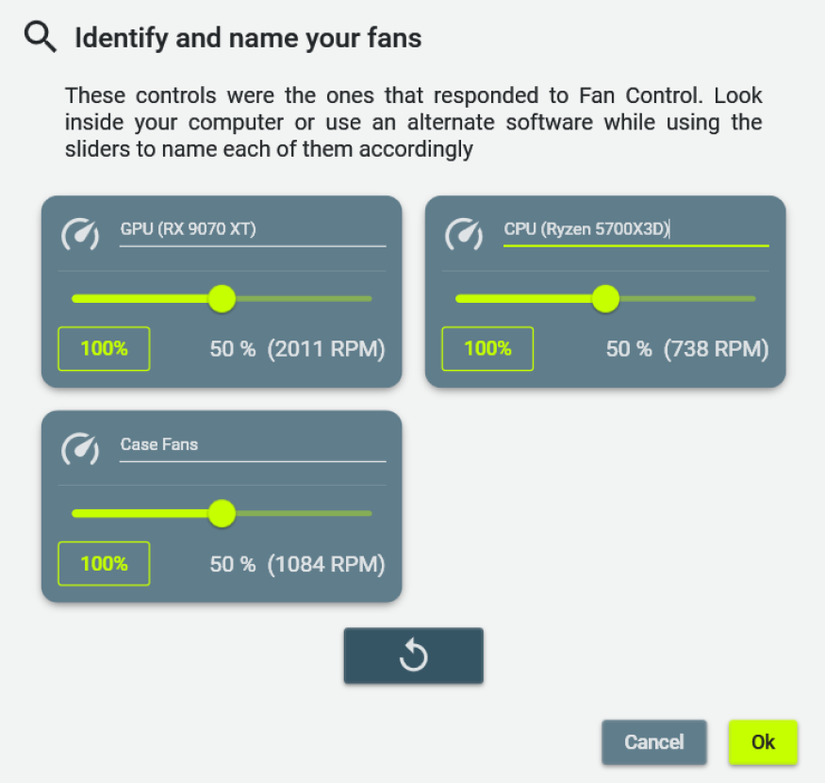
Now you can test the detected fans and name each one. Since my two case fans are connected in series to the same fan header, they appear as one fan. If your case fans are individually connected to the motherboard, adjust the slider for each fan and check which one is speeding up and which is slowing down. Once you determine which is which, name them accordingly. You can rename fans as you wish.
Once you're done, click OK.
The app will then ask you to configure a few more settings, such as startup behavior, and that's it! Now you can create your own fan curves, further test each fan, and do whatever you want.
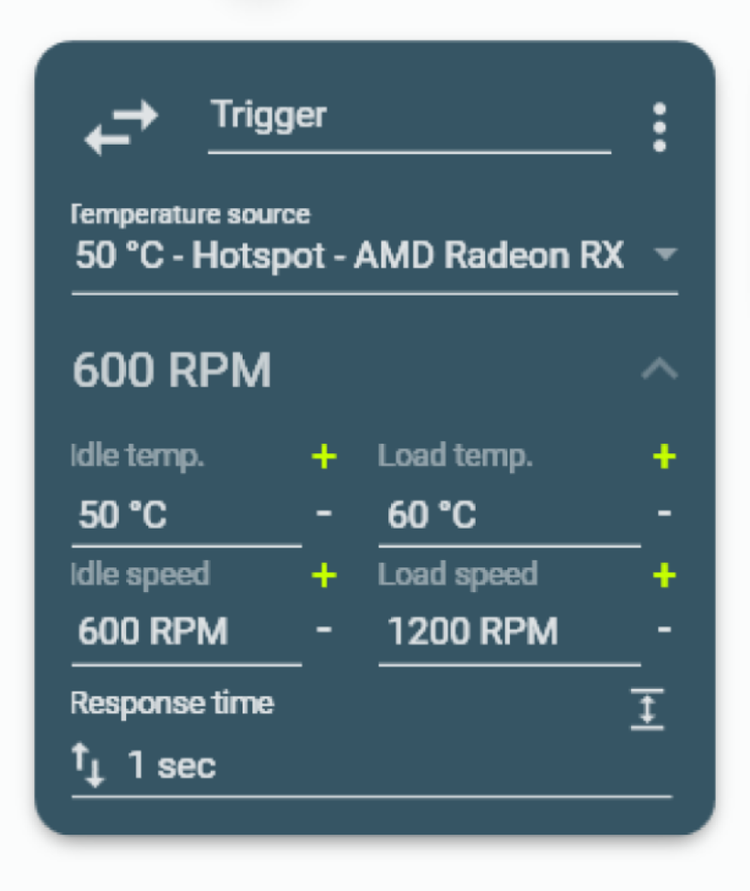
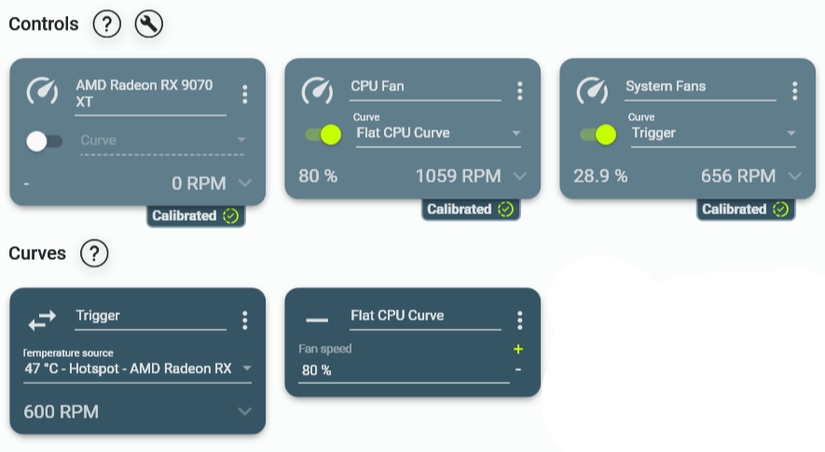
Personally, I use two custom fan curves. The first is a flat CPU fan curve set to 80%, which means my CPU fan is always works at 80% of maximum speed. The second curve is the case fan curve with the GPU hotspot sensor selected as the source. When the GPU AP temperature drops below 50 degrees Celsius, the two case fans run at 600 RPM and are inaudible. When the GPU is under load and its hotspot reaches 60 degrees Celsius, the chassis fans speed increases to 1200 rpm.
I didn't create a custom GPU fan curve because the standard option works quite well.
While creating custom fan curves is relatively simple, you might want to look at JayzTwoCents Video if you want a tutorial on how to create and configure different fan curves.
If you want a detailed video tutorial, the Onslaught PC YouTube channel has been created impressive lesson lasting over an hour this covers all the possible things you can do in Fan Control.
If you ask me, Fan Control is the best fan control software on Windows. The most impressive thing about this is that a single developer has created an application that is light years ahead of what big brands in the PC fandom world like Corsair and Lian Li are offering.
Fan Control works great on almost every Windows PC, receives regular updates (the latest version is 245 at the time of writing) and is one of the best open source apps for windows. I wholeheartedly recommend it to any PC owner who wants to control their system's fans—whether by creating a simple fan curve where the GPU temperature controls the speed of the case fans, or setting up a comprehensive fan control system with a set of custom curves covering every scenario.


